Great news, MythTV now works on FireTV. I have tested this with all versions of FireTV hardware except the original version (i don’t have this one) and they work to different degrees. You should stay clear of wireless and hard wire in to ensure no issues occur. The new 4k stick definitely shows its hardware prowess here. I also can’t complain about the second gen FireTV. Get all the details at the link below.
Category Archives: MythTV
Enabling Flash on Ubuntu Chromium
I am surprised that there is no flash capability in chromium to start out with in Mythbuntu. after some digging around I figured out how to install it. To start Follow the instructions in the Ubuntu wiki. Once you have done that, you need to enable it in Chromium itself as some of it is disabled.
- Open Chromium and type “chrome://gpu” in the url box.
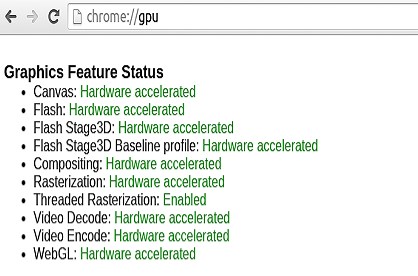
- If it does not look like this then its not fully enabled and you will see some entries listed as software only or partial software/hardware accelerated
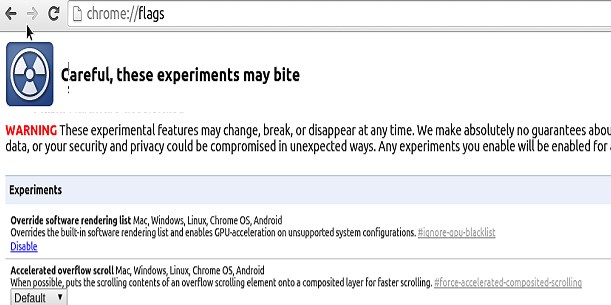
- To force Hardware acceleration open up a new tab and type in “chrome://flags”
- find the entry that says “Override software rendering list” and enable it. Then close and reopen the browser
- Now go back to the “chrome://gpu page and it should show everything set to Hardware accelerated.
You should be set to go. ESPN, Youtube should all play videos using hardware acceleration now (assuming you installed your graphics driver correctly).
ECS LIVA Setup Part 4
DHCP issues
My last problem is related to the way DHCP is handled with ubuntu. Now I could have disabled DHCP and just set everything static but I reload my frontends on a regular basis so I didn’t want to do that every time I setup a frontend. Instead I have created a script to start mythtv after a 10 second delay.
- Create script on the root of the filesystem named mythdelayed.sh
- Use the following Content
- #start mythtv in a delayed state because of slow ubuntu dhcp networking
- sleep 10
- mythfrontend –service
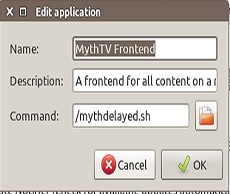
- Change the default mythtv startup entry
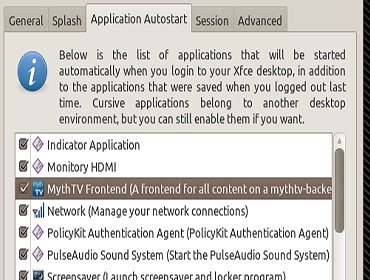
- Modify the entry to run the mythdelayed.sh script.
- Restart and it should auto launch after 10 seconds and you should be up and running. This concludes my LIVA setup postings. The next step is to configure Mythtv settings which I will leave up to you……
ECS LIVA Setup Part 1
ECS LIVA Setup Part 2
ECS LIVA Setup Part 3
ECS LIVA Setup Part 3
Monitory Disconnect/Re-connect Issue
So when i first got the LIVA i was not impressed with it at all. It did not work as I expected it to and felt I got ripped off. Needless to say after figuring out a few tweaks those problems are now gone. Today i will show you the first one that is the most painful.
To give you some background, I have loaded the Intel Graphics driver fine according to Intel’s support page. the problem I ran into is that every time I turned my TV off the HDMI connection would drop and when I turned the TV back on it would show in the logs as reconnected but the TV would still show no input. After trying several different TV’s and Computer monitors I gave up for a few months. One nite i decided to look again and here is what i came up with for a solution.
- cd to the top of the filesystem ( / )
- Create a new monitor-hdmi.sh script
- sudo vi monitor-hdmi.sh
- Paste in the follow text. (don’t add the numbers 1-9)
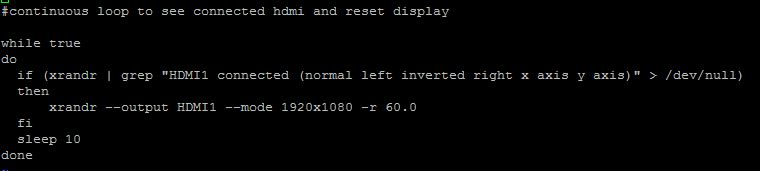
- #cont loop to see connected hdmi and reset display
- while true
- do
- if (xrandr | grep “HDMI1 connected (normal left inverted right x axis y axis)” > /dev/null)
- then
- xrandr –output HDMI1 –mode 1920×1080 -r 60.0
- fi
- sleep 10
- done
- Save the file and then “chmod +X monitor-hdmi.sh”
- additionally you need to set permissions with “chmod 777 monitor-hdmi.sh”
- If the monitor is not a 1080p monitor the resolution will change in step 2.2. for samsung 720p monitors its 1360×768
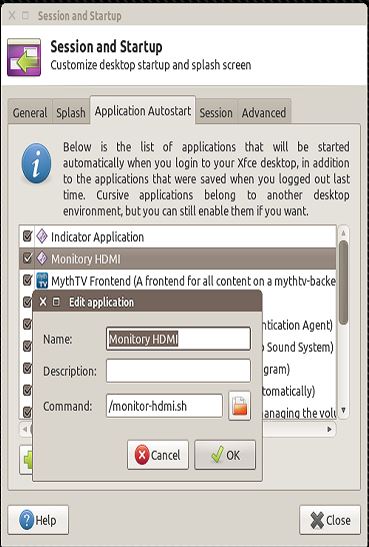
- Add the script to Session startup/App Autostart so that it starts at auto login.
- Now reboot and when you turn off your tv and turn it back on it should reconnect and show the HDMI output.
ECS LIVA Setup Part 1
ECS LIVA Setup Part 2
ECS LIVA Setup Part 4
#cont loop to see connected hdmi and reset display
while true
do
if (xrandr | grep "HDMI1 connected (normal left inverted right x axis y axis)" > /dev/null)
then
xrandr --output HDMI1 --mode 1920x1080 -r 60.0
fi
sleep 10
done
ECS LIVA Setup Part 2
- Download the Mythbuntu ISO
- Format USB stick using the following settings for Rufus
- Make sure you load the ISO first and then check the settings
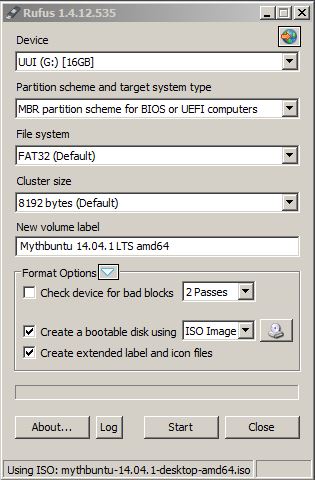
- Make sure you load the ISO first and then check the settings
- Once the USB stick is done, boot the LIVA off of it and install Mythbuntu using the onscreen instructions.
- Install PackageKit so you can install the Intel Linux Graphics Installer.
- Sudo apt-get install packagekit
- Download the Intel Linux Graphics Installer.
- Run the DEB file and wait for it to finish installing.
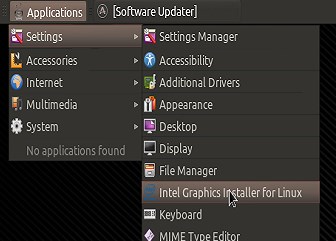
- After it has been installed, now you can actually download the drivers and have them configured. Find the Intel Graphics Installer in the menu like the screenshot below.
- Run the installer and wait, this process takes some time and will likely prompt you for a reboot at the end and it won’t reboot so you will have to manually reboot.
- I don’t use the wireless card that comes with the PC but if you want to us it, you have to do some funky stuff to make it work as it doesn’t work out of the box with mytbuntu (or any ubuntu version from what i hear). You can find more info about that here (steps 1-6).
This concludes Part 2, you should now have a fully functional ubuntu pc. Next part i will give you some stuff to tweak a few quirks with Intel and DHCP networking.
ECS LIVA Setup Part 1
ECS LIVA Setup Part 3
ECS LIVA Setup Part 4
ECS LIVA Setup Part 1
Introduction
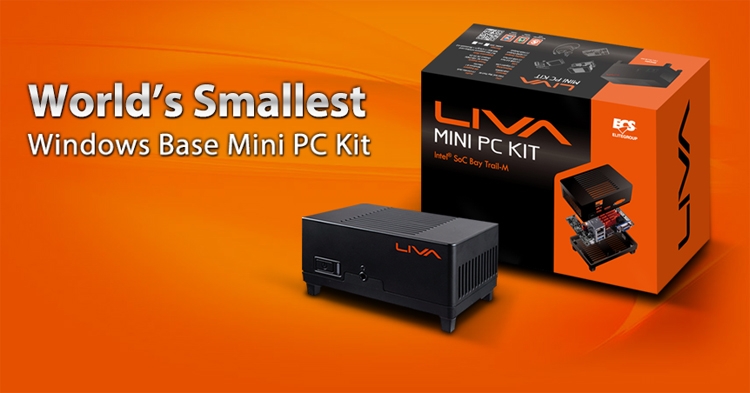 I have had this PC since it came out in July and thought i should do a writeup to share my thoughts and how to set it up. ECS has managed to create a nice x86 PC where others have failed with a nice CPU, Video, and Price features. I run Mythbuntu on all 3 of my LIVA’s. I have tried Windows 8.1 on one of them and it does pretty well even though the LIVA only features 32GB hard drive and 2GB ram for the version I have.
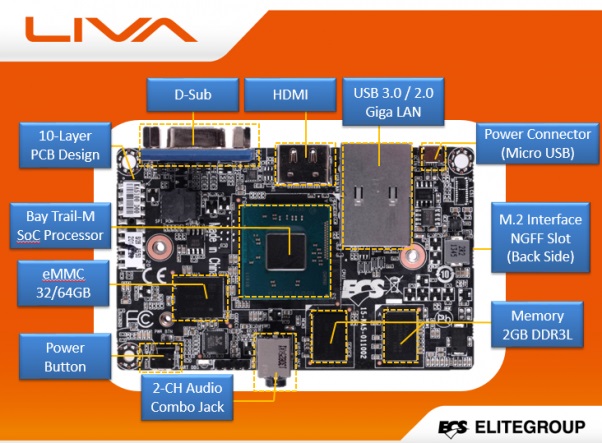 All versions of the LIVA are the same except for the hard drive storage which comes in 32GB and 64GB configurations. Feature wise you will find all the latest and greatest connectors on this mini pc. The USB 3.0 connector is a welcome upgrade that you wont find on any of the BayTrail Tablet Chip offerings such as the Zotac Pico. While I do like the fact it has a Gbit ethernet adapter on it, for the purpose of a MythTV frontend its not really needed. In the Next few posts I will show you how to install Mythbuntu and get it ready to watch movies and television.
ECS LIVA Setup Part 2
ECS LIVA Setup Part 3
ECS LIVA Setup Part 4